


We previously discussed what the Best Ways to Backup Your Files are and how you you can use Karen’s Replicator to effectively backup your important files to an external backup drive in case a disaster occurs.
I am now going to guide you how to set up Karen’s Replicator.
How to Set Up Karen’s Replicator Backup Software
1. Download the software by clicking here and install it.
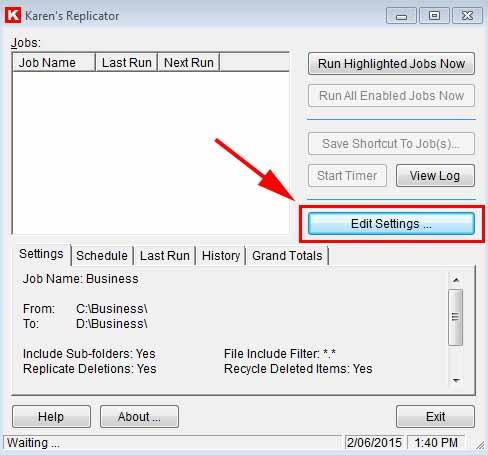
2. Run Karen’s Replicator and click on on Edit Settings ….

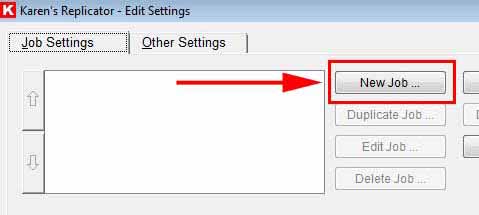
3. Click on New Job … to create your first backup job.

4. Let’s take a look at the configuration settings I use and if you need any additional information to setup your first job you can simply click on the Show Tips … button.
– Job Name: Enter a name for this job.
Seeing as I am backing up my Business Folder, I am going to name mine Business.
Source Folder: This is the folder that you would like to backup.
Click on Browse … and navigate to it.
– Destination Folder: This is the folder that you want to backup your files to.
Click on Browse … and navigate to it. Keep in mine that this folder should be on your External Back-up Drive.
Everything else I leave as default but I do select Replicate Folder and File Deletions and Move Deleted Items to Recycle Bin.
– Replicate Folder and File Deletions means if you delete a file in the Source Folder then it will also be deleted from your Destination Folder (External Backup Drive).
– Move Deleted Items to Recycle Bin means the files that are deleted from the Destination Folder will be put into the recycling bin.
This is useful as it allows you to restore files that have been deleted accidentally due to the Replicate Folder and File Deletions option being turned on.
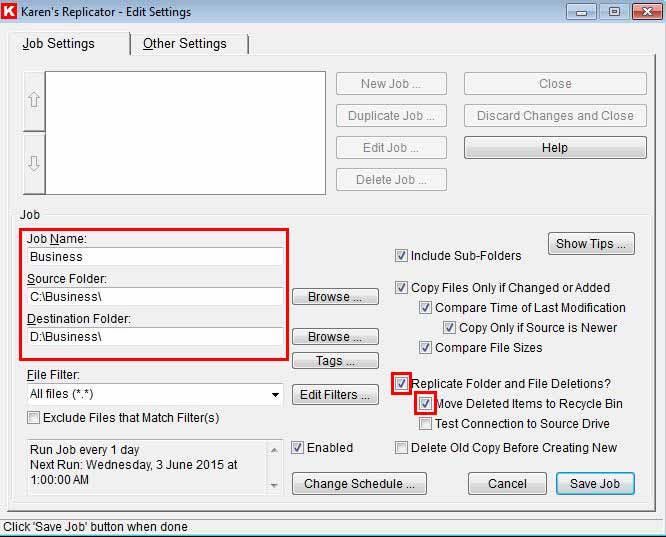

5. Once your done click on the Save Job button in the bottom left-hand corner.
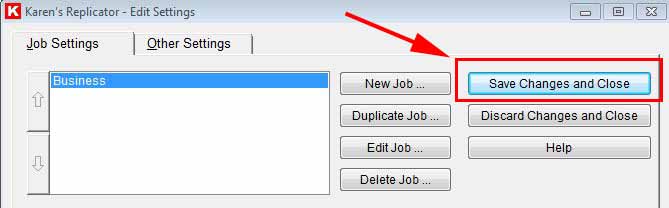
6. Click on the Other Settings tab at the top and change your Log and Miscellaneous settings if you like. As these settings are pretty self explanatory I’m going to let you go through them on your own, if you are unsure of something simply click on the Help button on the right-hand side for a detailed explanation.
7. Once your done click on the Save Changes and Close button.

8. Now that you have setup your first backup job, you need to run it by clicking on Run Highlighted Jobs Now if your job is selected or Run All Enabled Jobs Now if your job(s) are ticked.
To add more jobs simply follow the same process.
Thirsty for more knowledge? Click here to learn how to backup your Entire WordPress site!